

Learn how to build a niche directory website, choose a profitable niche, create listings, automate data entry, and explore monetization options.
Building a website does not always mean publishing blog posts, selling products, or offering online courses. Another possibility is to create a directory website that helps people find specific businesses, places, services, or activities.
For example, imagine a website that lists hiking trails in a particular region, swimming pools in a city, or coworking spaces near major business districts. Instead of searching through dozens of websites, visitors can explore a collection of relevant information in one place.
A well-maintained directory can attract visitors through search engines, develop relationships with businesses, and potentially generate revenue through advertising, sponsored listings, or paid submissions.
However, building a profitable directory requires more than installing WordPress and adding a few listings. You must choose a worthwhile niche, collect accurate information, make the website useful, and develop a strategy for attracting visitors.
In this guide, you will learn how to build a niche directory website with WordPress, even if you have never created this type of website before.
Disclaimer: Some of the links in this article are affiliate links. If you click on the link and purchase the item, I may earn a commission at no extra cost to you.
Table of Contents
ToggleWhat Is a Directory Website?
A directory website organizes information into structured listings so that visitors can find what they need more easily. Think of it as a specialized search tool.
Rather than attempting to cover everything on the internet, a directory focuses on a particular subject, location, or type of information.
For example, a local directory might list restaurants, repair shops, healthcare facilities, and other businesses. A more specialized directory could focus exclusively on public tennis courts or independent bookstores.
Here are some examples of established directory-style websites:
- Atlas Obscura: Features unusual places, attractions, and experiences.
- Pickleheads: Helps pickleball players discover courts and related playing opportunities.
- Soak Oregon: Focuses on hot springs in Oregon.
These examples illustrate different ways to organize information around a particular need. Their existence does not guarantee that a new directory will succeed, but they demonstrate the variety of directory concepts available.
How is a directory different from a blog?
A blog primarily publishes articles, guides, opinions, or news. A directory primarily organizes individual records that visitors can browse, filter, search, or explore by location.
For instance, a blog article might explain the benefits of playing pickleball. A pickleball directory might list courts, addresses, available facilities, and other useful details.
You can combine both formats. A directory about hiking trails, for example, could include trail listings alongside articles about hiking equipment, safety, and planning trips.
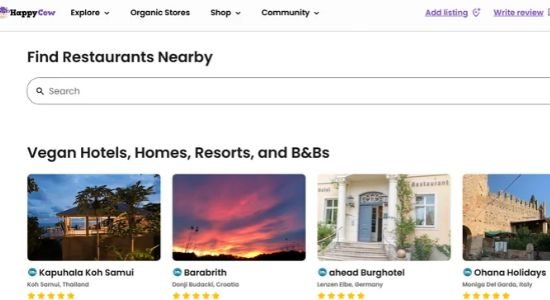
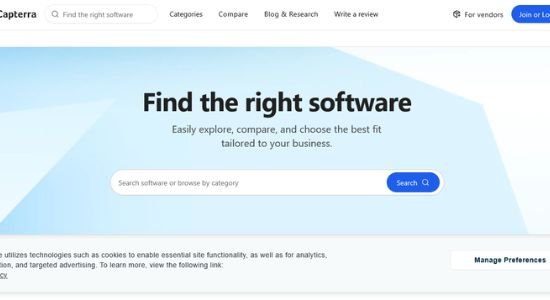
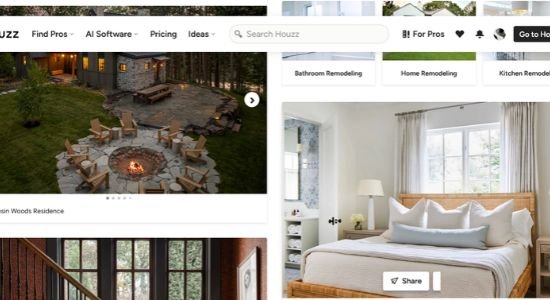
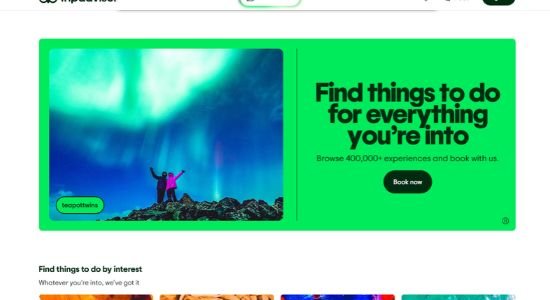
Successful Niche Directory Website


Profit Calculator
Lorem ipsum dolor sit amet, consectetur adipiscing elit. Ut elit tellus, luctus nec ullamcorper mattis, pulvinar dapibus leo.
How to Build a Niche Directory Website - Step by Step
Step 1: Choose a Directory Niche
Your first task is to decide what your directory will cover.
A common beginner mistake is trying to create a website that lists everything in an entire country or across multiple industries. Such a project can require substantial research, a large database, considerable maintenance, and significant competition.
A more manageable approach is to start with a specific subject and a clearly defined audience.
One simple brainstorming formula is:
Activity or subject + location = potential directory idea
For example:
- Pickleball courts in Austin.
- Hiking trails in Colorado.
- Best restaurants in Chicago.
- Independent bookstores in London.
- Budget hotels in Manhattan.
- Best tourist spots in Vermont.
You can also build a directory around a hobby or professional interest without limiting it to one location. The important thing is to give visitors a clear reason to use your website instead of a general search engine.
Validate your idea before spending money
Choosing something you enjoy is a useful starting point, but personal interest alone doesn’t prove a directory is commercially viable.
Before purchasing hosting or installing plugins, investigate your proposed niche.
- Check whether people are looking for this information.
Search Google for relevant phrases, such as “pickleball courts in Austin” or “best coworking spaces in Chicago.” Explore the questions people ask and the websites that already serve them.
Keyword research tools can help estimate search demand, although their figures are estimates rather than guarantees of future traffic.
- Examine existing competitors.
Look at established directories, local business websites, maps, and community resources. Identify what they do well and where their information is incomplete, outdated, difficult to navigate, or poorly organized.
Competition can indicate that a market exists. Your task is to discover a useful way to serve that market better.
- Find a reason for people to choose your directory.
Would your website provide verified opening hours, accessibility information, price ranges, specialist filters, original photographs, or detailed comparisons?
A directory that merely copies information already available elsewhere may struggle to attract repeat visitors.
- Determine whether reliable data is available.
Can you collect enough accurate listings to make the website useful? Are there official websites, public datasets, business owners, or other legitimate sources you can use?
If reliable information is difficult to obtain or maintain, choose a more manageable niche.
- Consider potential revenue sources.
Think about whether relevant businesses might pay for additional exposure, whether local advertisers could be interested, or whether suitable affiliate partnerships exist.
Do not assume that traffic alone will make the project profitable.
Beginner’s tip: Start with one city, one region, or one clearly defined audience. Expand only after you have evidence that your initial directory is useful and attracting interest.
Step 2: Register a Domain and Choose Web Hosting
Once you have validated your idea, you need a domain name and web hosting.
A domain name is your website’s address, such as example.com.
Web hosting is the service that stores your website’s files and database and makes them accessible online.
You generally need both to run a self-hosted WordPress website.
Choose a suitable domain name
Try to choose a name that is easy to remember, relevant to your project, and simple to spell.
For a directory focused on local hiking trails, for example, a name that communicates the subject or region may be appropriate.
You do not need to force exact keywords into the domain. A clear, memorable name is often more useful than a long address packed with search terms.
Before registering a domain, check its availability and consider whether its name could restrict future expansion. Also review any relevant trademark concerns.
Select a hosting provider
Compare hosting providers based on:
- Total cost, including renewal prices.
- WordPress compatibility and ease of installation.
- Available storage and performance resources.
- Backups and restoration options.
- Security features and support.
- Upgrade options as the website grows.
Providers such as Hostinger offer WordPress hosting, but it is worth comparing available plans rather than assuming that one provider or package is best for every project.
A beginner can often start with an affordable plan that meets the website’s actual requirements. More expensive hosting is not automatically necessary for a small directory.
Pay attention to introductory discounts and renewal pricing. A low initial price may not represent the long-term cost.
After purchasing hosting and registering your domain, follow the provider’s instructions to connect the domain and install WordPress. Many hosting dashboards offer an installation wizard.
Keep your login credentials secure, enable available security protections, and make sure you understand how to access your hosting control panel and WordPress dashboard.
Step 3: Install WordPress and the Necessary Tools
WordPress is a content management system that lets you create and manage a website without building everything from scratch in code.
After installation, visit your WordPress administration area, commonly available at yourdomain.com/wp-admin, and sign in.
You will use this dashboard to manage your pages, posts, appearance, plugins, and other website settings.
Choose a theme
A WordPress theme controls much of your website’s visual appearance and layout.
Choose one that is responsive, reasonably lightweight, compatible with your directory plugin, and easy to maintain.
A responsive website adjusts its layout to different screen sizes, including mobile phones and tablets.
You do not have to use the Hello Elementor theme demonstrated in some tutorials. Other themes may also work. Your choice should depend on the design you need, compatibility, performance, and your budget.
If you use an existing website, test major theme changes on a staging site where possible. Changing themes can affect menus, layouts, widgets, and other design elements.
Install a directory plugin
A directory plugin provides the functionality needed to create and manage individual listings.
For example, GeoDirectory is a WordPress plugin designed for business directories and other location-based listings. Its features can include addresses, maps, categories, and structured listing information.
To install it:
- In your WordPress dashboard, open Plugins > Add New Plugin.
- Search for GeoDirectory.
- Confirm that you have selected the intended plugin.
- Click Install Now, then activate it.
- Follow the setup instructions presented by the plugin.
You can find the plugin and its installation information in the official GeoDirectory listing on WordPress.org.
GeoDirectory is one option, not a universal requirement. Other directory plugins may suit different projects. Compare their features, costs, compatibility, and limitations before committing to one.
Some advanced features may require paid extensions. Check the current feature list before assuming that everything demonstrated in a tutorial is included in the free version.
Do you need Elementor?
Elementor is a visual page builder for WordPress. It lets you design page layouts using a drag-and-drop interface.
It can be useful when you want more control over the appearance of your homepage or other pages without writing code.
However, Elementor is not the directory database itself. A directory plugin manages the listing functionality, while a page builder helps you design the presentation.
You can use Elementor if it suits your workflow, but you do not necessarily need it. WordPress’s built-in editor and a compatible theme may be sufficient for a simpler website.
If you choose Elementor, install and activate the appropriate plugin, then learn the basic editing controls before making extensive design changes.
Step 4: Configure the Directory and Design Your Homepage
After installing the directory plugin, configure its basic settings.
Depending on the plugin, you may need to select a default location, choose a map provider, configure categories, and decide which fields appear in each listing.
For a local directory, these settings help organize information in a consistent format.
Set up your categories
Categories help visitors browse related listings.
For a directory of outdoor activities, categories might include hiking trails, parks, camping areas, and recreational facilities.
For a professional directory, categories might include web developers, graphic designers, accountants, and marketing consultants.
Start with a small number of useful categories. Too many overlapping categories can confuse visitors and make the directory harder to maintain.
Customize the homepage
Your homepage should immediately explain what the directory offers and help visitors find relevant listings.
Consider including:
- A clear heading describing the directory.
- A short explanation of whom it serves.
- A search bar or prominent browsing options, if supported.
- Important categories.
- Featured or recently verified listings.
- Links to useful guides or related resources.
- A clear way for businesses to suggest or submit information, if appropriate.
For example, a directory of pickleball courts could use a heading such as “Find Pickleball Courts Near You” followed by a location search and links to available court listings.
If you use Elementor, open the relevant page and select the option to edit it with Elementor. You can then modify supported page elements, such as headings, text, images, and sections.
Save or publish your changes and preview the page on both desktop and mobile.
Important: If you import a demo template, its sample listings and photographs may relate to a completely different industry. Replace the demonstration content rather than publishing it as if it were genuine information about your niche.
Step 5: Create Your First Directory Listing
Now comes the most important practical stage: adding a real, useful listing.
For this example, imagine that you are creating a directory of recreational facilities.
Your first listing might represent a local sports center. The same basic approach can be adapted to businesses, tourist attractions, professional services, or other subjects.
Collect the information
Before creating the listing, gather the details that visitors actually need.
Depending on the type of directory, these might include:
- Listing name.
- Short, factual description.
- Full address or location.
- Relevant category.
- Website and contact information, where appropriate.
- Opening hours, if applicable.
- Photographs that you have permission to use.
- Useful features, facilities, or services.
- Date the information was last verified.
Do not invent information simply to fill every field. If a detail cannot be verified, leave it out or explain that it is unavailable.
Add the listing in WordPress. The precise steps depend on your chosen directory plugin, but the general process is similar.
- Open the directory plugin’s listing management area in WordPress.
- Select the option to add a new listing.
- Enter the listing’s name and description.
- Choose the appropriate category.
- Add the address or location information.
- Upload a suitable image that you own or are authorized to use.
- Complete any relevant fields, such as contact information or opening hours.
- Preview the listing, verify its details, and publish it when ready.
With GeoDirectory, you can manage listings through its directory-related administration screens. Consult its official documentation if your interface differs from the steps described here.
Use AI to help write descriptions, not invent facts
AI tools such as ChatGPT can help turn verified notes into clear, readable descriptions.
For example, you could provide the confirmed location, available facilities, and relevant features of a sports center and ask an AI tool to produce a concise directory description.
However, AI-generated text may contain unsupported details. It might incorrectly state that a facility has parking, accessible entrances, particular opening hours, or specific equipment.
Always check the output against reliable sources before publishing.
A well-written listing is not necessarily a good listing if its information is inaccurate.
Add a suitable image
Images can help visitors understand what a place or business offers.
Use your own photographs, properly licensed stock images, or images for which you have permission. Do not assume that an image is free to reuse simply because it is available through a search engine.
Compress images before uploading them, use descriptive file names where practical, and provide meaningful alternative text when an image conveys useful information.
Avoid uploading unnecessarily large image files, especially if the directory will eventually contain hundreds or thousands of listings.
Verify the listing on the live website
After publishing, visit the actual listing page.
Check that:
- The name and description are correct.
- The map points to the correct location, where applicable.
- The image displays properly.
- Contact details and links work.
- The page is readable on mobile.
- The listing appears in the expected category and search results within your directory.
Correct any errors before moving on to the next listing.
Step 6: Add More Listings Efficiently
One listing is enough to understand the basic process, but a directory needs enough useful information to serve its intended audience.
You can add listings manually, import structured data, invite businesses to submit information, or use appropriate automation tools.
Option 1: Add listings manually
Manual entry is a sensible way to start a small directory. It allows you to check each record, write useful descriptions, and verify the information before publishing.
The drawback is that manually creating hundreds of detailed listings can take considerable time.
Option 2: Import structured data
Some directory plugins and extensions support importing information from structured files, such as CSV spreadsheets. A spreadsheet might contain columns for the listing name, address, category, website, and other relevant fields.
Before importing data, check that your plugin supports the required format and that each field is mapped correctly.
Test with a small sample first. A badly configured import can create duplicate records, incorrect addresses, or incomplete listings.
Option 3: Automate suitable parts of the process
Automation tools can help collect or organize information from authorized sources, transform data into a consistent format, and prepare records for import.
However, automation does not eliminate the need for verification.
Before collecting data from another website, check its terms of use, applicable laws, privacy requirements, and the permissions or licences governing the information. Publicly accessible information is not automatically unrestricted for every use.
Avoid collecting unnecessary personal information or copying protected descriptions and photographs without permission.
A useful directory should offer genuine value rather than merely reproducing another website’s content.
How many listings should you publish initially?
There is no universal number that guarantees success.
A small directory containing 20 accurate, genuinely useful listings can be a better starting point than a website containing hundreds of poorly verified entries.
Begin with enough information to solve a specific problem for your intended audience. Then expand in response to visitor needs, data availability, and evidence of demand.
For each listing, consider recording when its details were last checked. Revisit important records periodically so that outdated addresses, closed businesses, and incorrect contact information do not undermine the directory.
Step 7: Optimize Your Directory for Search Engines
A directory can contain useful information and still struggle to attract visitors if people cannot discover it.
Search engine optimization, or SEO, helps search engines understand your pages and can improve their chances of appearing for relevant searches. It does not guarantee rankings or traffic.
Give each listing a clear purpose
Use descriptive titles, meaningful headings, accurate descriptions, and relevant categories.
For example, a page about a specific hiking trail should identify that trail and provide useful information about it. Avoid generating hundreds of nearly identical pages that differ only by a place name.
Each published page should offer a clear reason for visitors to view it.
Add useful information beyond basic contact details
Where relevant and verifiable, include information such as facilities, accessibility, service areas, pricing, booking requirements, or practical directions.
The appropriate information depends on the directory’s purpose.
A directory of professional services needs different details from a directory of hiking trails. Focus on what helps the intended audience make an informed decision.
Build useful category and location pages
Category pages can help visitors discover related listings. Location pages can organize information by city, region, or another meaningful geographic area. Create these pages where they genuinely help people navigate the directory.
Do not automatically generate large numbers of thin location pages simply to target more keywords. Google’s guidance emphasizes helpful, reliable, people-first content rather than large volumes of unoriginal pages created primarily to influence search rankings.
Read Google’s guidance on creating helpful content for more information.
Make the website fast and mobile-friendly
Visitors should be able to find information without waiting for unnecessarily slow pages.
Use appropriately sized images, remove unnecessary plugins, choose suitable hosting, and test the website on mobile devices.
If your directory eventually contains many listings, monitor performance as the database grows. A configuration that works for a small website may need improvement as traffic and data increase.
Set up essential SEO tools
Consider using Google Search Console to monitor how Google discovers and indexes your website, which queries generate impressions, and whether technical problems need attention.
An SEO plugin can help manage page titles, meta descriptions, canonical settings, and other relevant configurations.
Remember that adding a keyword to every title does not guarantee rankings. Accurate information, useful pages, sound technical setup, and a good visitor experience are more important than repetitive keyword insertion.
Step 8: Explore Ways to Monetize Your Directory
Once the directory provides genuine value and begins attracting relevant visitors, you can evaluate possible revenue models.
There is no guarantee that a directory will become profitable. Results depend on the niche, competition, traffic, audience, operating costs, and the willingness of businesses or advertisers to pay.
- Display advertising
You may be able to earn revenue by displaying advertisements through an advertising network, subject to its eligibility requirements and policies.
Advertising revenue depends on factors such as audience location, page views, ad impressions, advertiser demand, and the types of ads shown.
Do not rely on estimates based solely on another website’s traffic. Its actual earnings may be private, and your results may be very different.
Apply to an advertising network only when your website meets its current requirements.
- Paid or featured listings
You could allow businesses to pay for enhanced profiles, additional photographs, greater visibility, or placement in a clearly identified featured section.
This model works best when the directory attracts an audience that businesses genuinely want to reach.
Keep paid placements clearly labelled and avoid allowing payment to mislead visitors about the accuracy or quality of a listing.
- Business submissions
A directory might charge businesses to submit a listing or offer free basic listings alongside paid upgrades.
Before introducing charges, consider whether your directory already provides enough value to justify payment. A new directory with little traffic may struggle to convince businesses to pay.
You may need to build an audience and demonstrate the value of the service first.
- Sponsorships
Relevant companies may be interested in sponsoring a category, guide, newsletter, or other feature.
For example, a hiking directory might attract interest from outdoor equipment retailers or local tour operators, provided the sponsorship is relevant to its audience.
Disclose sponsorships clearly and preserve the independence and usefulness of your directory.
- Affiliate marketing
You may earn commissions by referring visitors to relevant products or services through affiliate links.
For example, a directory about outdoor activities might include useful recommendations for hiking equipment or booking services where appropriate affiliate programmes are available.
Affiliate links should support the visitor’s needs rather than distract from the directory’s main purpose. Disclose affiliate relationships clearly and follow the applicable programme rules.
A sensible approach is to begin with one potential revenue model and test it. Do not add intrusive advertisements or charge businesses before you understand what your audience values.
Step 9: Measure Progress and Improve the Directory
Launching the website is the beginning, not the finish line.
Use analytics and search performance data to understand how visitors discover and use your directory.
Look for evidence that people are finding relevant pages, exploring listings, clicking useful links, and returning when they need information.
You can then improve the website based on what you learn.
For example:
- If visitors search for categories you have not covered, consider adding them.
- If important listings contain incomplete information, improve their records.
- If mobile visitors struggle to navigate the site, simplify the layout.
- If a page attracts search impressions but few clicks, review its title and description.
- If businesses receive value from the directory, explore whether they would pay for additional features.
Avoid judging the project only by the number of pages published. A smaller directory that solves a real problem may be more valuable than a much larger website full of repetitive or outdated entries.
Common Mistakes to Avoid
Before expanding your directory, keep these mistakes in mind.
Choosing a niche without research: A subject you enjoy is not automatically a business opportunity. Check demand, competition, data availability, and possible revenue sources.
Publishing unverified information: Incorrect addresses, hours, prices, or services can damage trust. Verify factual details before publication.
Depending entirely on automated content: Automation can save time, but it cannot replace editorial judgment, fact-checking, and useful original information.
Copying other directories: Collecting information without considering permissions or adding value can create legal, quality, and search visibility problems.
Installing too many plugins: Every additional plugin introduces potential maintenance, compatibility, and security considerations. Use tools that serve a clear purpose.
Expecting instant passive income: A directory needs research, maintenance, promotion, and improvement. Advertising or affiliate revenue may take time to develop, and profitability is never guaranteed.
Expanding too quickly: Prove that your initial directory is useful before building many additional categories or locations.
A Practical 30-Day Starting Plan
If you are new to website building, the following schedule can help you approach the project in manageable stages. Adjust it according to your available time and the complexity of your chosen niche.
Days 1–5: Research the idea
Choose a subject and location, examine competitors, check search demand, identify reliable information sources, and outline a potential revenue model.
Days 6–10: Set up the website
Register a domain, arrange hosting, install WordPress, choose a suitable theme, and install the directory functionality you need.
Days 11–15: Create the basic structure
Set up the homepage, categories, navigation, and individual listing layout. Add a small initial collection of verified listings.
Days 16–20: Improve listing quality
Check addresses, descriptions, images, links, and other relevant details. Make sure visitors can navigate the directory on mobile devices.
Days 21–25: Improve discoverability
Review page titles, internal links, category structure, mobile performance, and basic technical SEO. Set up appropriate analytics and search monitoring tools.
Days 26–30: Test and refine
Ask a few people from your intended audience to use the directory. Identify missing information, confusing features, and technical problems. Make improvements before expanding.
At the end of 30 days, you may have a functional first version of your directory. That is a useful milestone, but it does not guarantee search traffic or revenue. Your next steps should be guided by the quality of the website, the needs of your audience, and the evidence you collect.
Concluding Remarks
A niche directory website is one possible way to build an online business around organized, useful information. WordPress and directory plugins can make the technical side more accessible, even for beginners.
The greater challenge is building something people have a reason to use.
Start with a focused niche, validate the opportunity, publish accurate listings, and make the website easy to navigate. Add automation carefully, improve the directory based on real feedback, and explore monetization when you have a credible value proposition.
You do not need to build a massive directory from day one. A focused, well-maintained resource that serves a specific audience is a more sensible starting point than a large website filled with unverified information.
The goal is not simply to publish listings. It is to create a directory that helps people find what they need more easily.
Read More:
Image Source Acknowledgement: Unsplash